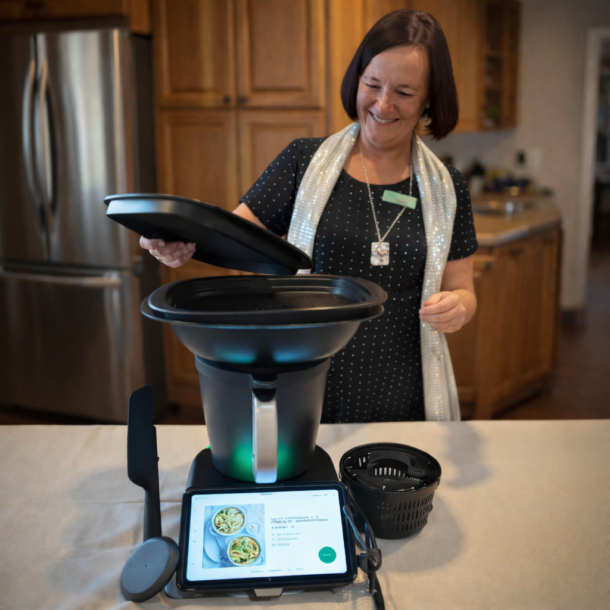
Fresh grapes, a little patience, and the Thermomix doing most of the work. Using the Varoma to gently steam the fruit allows you to extract beautifully clear juice and make homemade grape jelly in a single day, without the traditional overnight straining.
Wash the fruit well and place in Varoma dish, leaving them on the vine removing the leaves
If using larger fruit such as apples or quinces, cut them into pieces to help release the juice faster
Place 1 litre of water into the Thermomix bowl
Insert the simmering basket into the bowl
Place a heatproof collection vessel inside the basket to catch the juice dripping from the fruit above
Put the lid on, then place the Varoma with fruit on top
Cook: Varoma temperature - 20 minutes
As the fruit steams, juice will drip down into the collection vessel below.
After about 20 minutes:
Carefully remove the collection vessel from steaming basket and pour the collected juice into a bowl
Return the vessel to the basket
Repeat the steaming process until the juice running from the fruit becomes very pale in colour
This process can take a few hours, but the Thermomix runs mostly unattended. It’s a great recipe for a day when you're pottering around the house and can check in occasionally
Step 2 – Make the Jelly
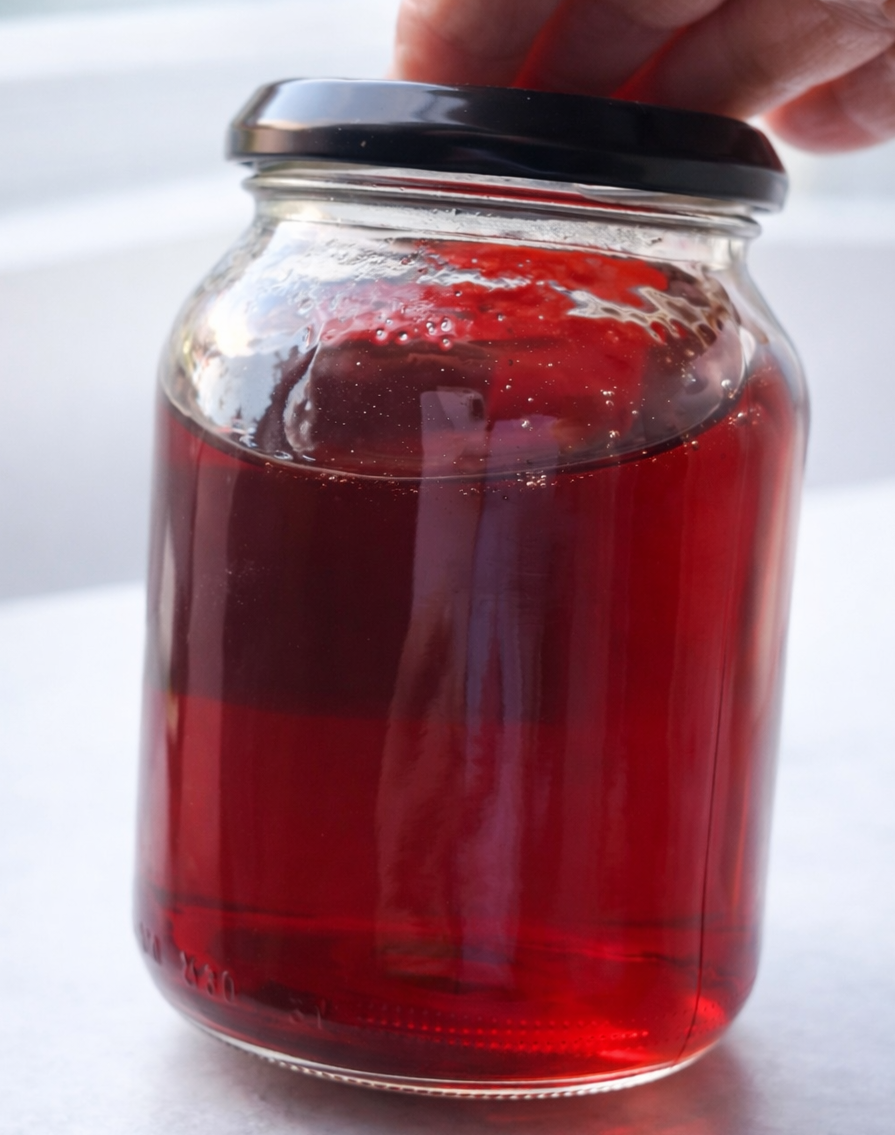
Place 1 litre of fruit juice into the Thermomix bowl
Add 800 g sugar (or 80% of the liquid volume)
Cook: 100°C - until the mixture reaches a boil
Then increase to 110°C - Speed 2
If the mixture starts to boil over, simply reduce the temperature back to 100°C
Allow the jelly to reduce
On the TM7, you can remove the lid at sp2 to check the level of the liquid. All other models, look through the hole in the lid or pause the machine to check
The liquid will gradually reduce to around 700–750 ml, depending on how firm you prefer your jelly
Step 3 – Test for Setting Point
There are two simple ways to test if the jelly is ready
Spoon Test - Dip a spoon into the jelly, it should coat the spoon and begin to thicken as it cools
or the Cold Saucer Test - Place a small spoonful onto a cold saucer. Wait a moment, then gently push it with your finger. If the jelly wrinkles slightly, it is beginning to set. If it still runs like syrup, cook a little longer and test again.
Step 4 – Bottle
Pour the hot jelly into sterilised jars and seal
As it cools, the jelly will continue to firm up and develop that beautiful clear finish
Notes
It’s always best to use seasonal fruit. Not only is it usually cheaper, but it’s also at its best flavour when it’s in season.This week I’ve used grapes and quince, and later in the season I’m looking forward to trying feijoas.